Mister cleaner
Blog entries
This was our final poster with the improvements we made based on the previous draft poster.
This was the first draft of our poster for “Mister Cleaner”. After taking feedback from our group leader we edited it and changed the different features. We made the text with our names larger and more visible. Instead of having the product as a collection of shapes we took an image of the design itself and used it in its place. We also decluttered the poster by removing some of the animals and making them all one size. As well as this we also made the images of the pollution more of a cartoon look in order to match the rest of the poster.
This was us developing the basic model body we had made to make it more like what Faridah had drawn. So we decided instead of wrapping the model with just orange card we would also use some tissue paper as well to create texture.
Also, for the tube which takes in the pollution we used a kitchen roll tube and a toilet roll tube. We used two separate tubes so we could add a curve in the pipe. We did this by cutting a slant on the smaller toilet tube and then sticking the two together using tape and glue.
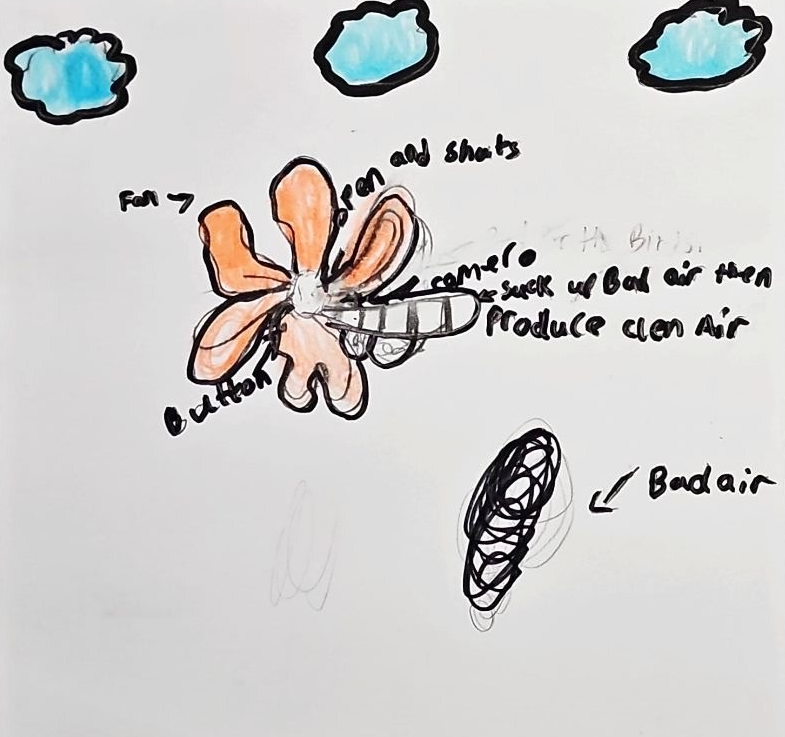
In the drawing by Faridah they had specified that the device started by pushing a button on the back so we cut a small black circle of cardboard which we wrote “push” onto and then stuck to the back of the device. It was also mentioned that there was a camera on the device so we added a lens to the front just underneath the tube to replicate that.
This was the initial stage of the model making process. First off we cut out the flower shape and then traced the shape onto orange card and cut it out and stuck it down to add colour to the model. We then added the sides to the model to create some depth and make it 3 dimensional. This made the main body of our product.
To begin we did some initial sketches based on what Faridah had drawn. We spent time trying to get a better understanding of the parts, what they did and how we would assemble them. We came to decide that there would be four parts of the device; the main body, the air filter tube, the start button and the camera lens. Both the camera and the filter tube stick onto the front and the button sticks onto the back of the device.